

How To Install J Channel On Existing Siding
How to Install J Channel Under Existing Siding
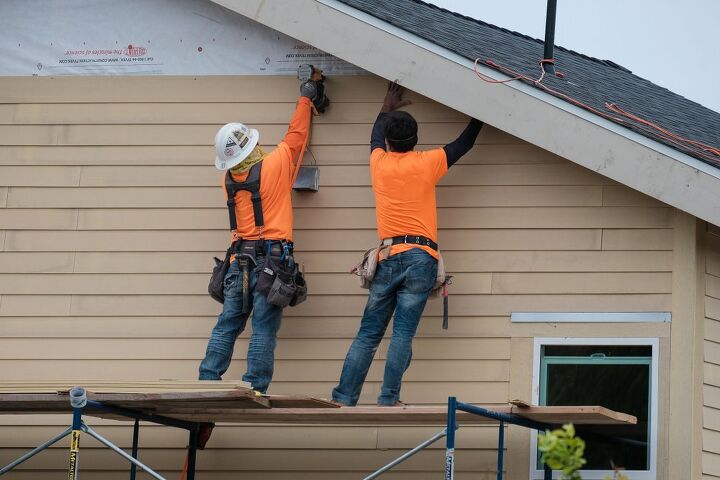
J-Aqueduct is installed around doors and windows. The metal frames help secure vinyl siding and can fifty-fifty be placed underneath the panels if done properly. Whether information technology be trimming the edges or removing the vinyl, follow along as we explore each step in installing J-Channel nether siding.
When you take a home with vinyl siding, you lot want the siding to appear every bit sleek and well cared for as possible. If yous're installing new or need to replace some of the siding on your domicile, the J-channel is an essential piece involved in the trim work.
However, if you lot've noticed that the pre-existing J-channel on your home is damaged, broken or never existed in the first place, you may be wondering how to install it on already existing vinyl siding. Installing J-channel underneath existing siding is a relatively straightforward procedure.
Normally the J-aqueduct is installed first and and so the vinyl siding is slid into place. All the same, there may be a number of reasons why you need to install a fresh J-channel after the fact. In this instance, yous basically accept two choices for installing J-channel under existing vinyl siding. Yous tin can either remove some of the siding to install new trim or cut off the perforated border of the J-channel and slide it into place along the windows, doors, corners or wall edges, securing it with nails or screws.
Let's explore the entire process involved in installing J-channel both before the vinyl siding is put in place and later on the fact.
What is a J-Channel?
As previously mentioned, J-channel is a vital slice to the vinyl siding on any home. It allows you lot to perform trim work similar the professionals and make your vinyl siding look uniform. J-channels are generally used to frame the walls, doors, windows, inside corners and anywhere the siding meets the roof or soffit on an bending.
Essentially, J-channel is used in conjunction with the siding wherever the siding meets these particular locations to assist cover up the cut pieces and achieve a seamless expect. Instead of a rough a jagged look, using J-channel tin assistance yous attain the finished and sophisticated look you are going for with your siding.
While it makes the nearly sense to install your J-channel prior to mounting the vinyl siding, if necessary, information technology can exist washed afterwards.
Installing J-Channel Under Existing Siding
If you need to install a fresh set of J-aqueduct or you're adding it for the first time to your already present vinyl siding, you have 2 methods to cull from. You can trim the perforated edge of the J-channel, slide it into place where the siding meets a wall, door, window, corner etc. and so fasten with screws or nails. Or, y'all can choose to remove a section of the siding in order to secure the J-channel underneath.
Install J-Aqueduct by Trimming Perforated Edge
This method works great in instances where you don't want to remove any of the pre-existing vinyl siding or accept broken J-channel that yous want to simply cover up. All it requires is that you trim whatsoever sometime J-aqueduct, cut off the perforated edge of the new and slide it hands in place over height.
If you have broken or damaged J-channel, start by removing any silicone from the gap that holds it in identify. This can be done very simply past using a utility knife to cutting it out.
Also, cut the broken J-channel as short as possible forth its unabridged length so that it volition be successfully hidden under the new slice.
Next, take your new J-aqueduct piece and trim off the perforated edge, this piece will not be necessary for this method. Measure out the length that the J-channel volition need to exist and apply either a set of heavy-duty scissors or a saw to cut it to the necessary length.
With the gap articulate of silicone and the J-aqueduct properly cut, yous can simply slide the slice into the gap and over the onetime, damaged J-aqueduct. To spike in identify, you can use silicone in the gap or nails or screws underneath the J-channel.
Install J-Channel by Removing The Vinyl Siding
In club to temporarily remove some of the siding and install the J-aqueduct, you'll need a naught tool, flat bar, hammer, nails and the J-aqueduct itself.
- Locate the areas where yous will need to mount the J-channel and determine which pieces of siding you lot will need to pull back in order to do so.
- Using a cypher tool, hook information technology into the barrel edge of the siding that you will exist removing. This may exist hard if the siding is tight but you can endeavor searching for a looser piece.
- Once the nada tool is in place, pull down on the siding. Move the zilch tool along the length of the siding strip to expose the nailing hem that is underneath the siding.
- Take your flat bar and wedge it between the siding and the nail heads.
- Remove the nails that are holding in the siding very advisedly.
- To completely remove the siding strip, slide it down. Otherwise, you tin can endeavor installing the J-aqueduct by just pulling the siding pieces dorsum.
- Cut your J-aqueduct and install information technology and then that it fits flush against the window, door, or wall.
- Hammer nails into the perforated holes on the J-aqueduct to hold it in place.
- Reinstall the siding that was either pulled abroad or completely removed.
That's all there is to information technology! With some knowledge and a fiddling patience, yous can successfully install J-aqueduct underneath existing siding past pulling information technology dorsum or removing it entirely.
Measuring J-Channel
To ensure proper installation, it's important that the J-channel is measured accurately. For the virtually precise measurement, make sure that you lot are carefully measuring effectually the door, window or corner that it is existence installed. For the best fit, mensurate from the outside of the existing trim.
It's essential that the channel is given ample space for the siding to contract and expand in respond to temperature changes. For best results, the siding should be cutting slightly shorter in places where J-channel exists.
If y'all are installing J-channel under pre-existing siding, trim the siding slightly to compensate for the changes that volition occur in regards to temperature. All the same, do not cut the sitting too short as the siding could potentially fall out of the aqueduct.
J-Channel Moisture
When you lot're installing J-channel, cut the ends at a 45-degree angle and brand a small-scale cutting on the top piece. This will allow for water to flush down the aqueduct instead of becoming trapped inside.
Additionally, this prevents any potential water damage acquired by moisture entering underneath the vinyl siding. For this purpose, many J-aqueduct manufacturers actually include a small perforation along the channel to prevent any moisture concerns.
How to Install Vinyl Siding With J-Channel
Whether you lot are installing new vinyl siding or replacing old, the J-aqueduct is a crucial office of the trim work. The J-channel is by and large used around windows, doors, on inner corners, and where the siding meets the roof at an angle to create a seamless await. Once the J-channel is installed, it'south as easy equally sliding the siding panel in place and fastening with the appropriate nails.
As far as materials become, you should apply rust-resistant, galvanized, aluminum or stainless-steel roofing nails with a head diameter of three-eighths of an inch. The diameter of the shank should exist long plenty to pierce a 3-quarter inch base. When nailing vinyl siding, you never desire to smash too tightly and should always go out ample space to account for expansion.
Hither are some tips for installing vinyl siding with J-channel in the various locations on your home's exterior.
- The Walls: If the top row of siding has to be cutting, install J-channel at the acme equally opposed to a utility trim. To keep this last section of siding from collapsing confronting your firm, you tin smash a strip of plywood confronting the J-channel. This volition keep information technology from sliding away.
- Windows and Doors: For best results, install J-aqueduct around all four sides of a window and three sides of the door. Position the J-aqueduct confronting the window casing and smash it to the wall, leaving roughly ane sixteenth of an inch between the vinyl and the blast caput.
- Soffit and Fascia: Install lengths of the J-aqueduct along the inner edge of the fascia board. This volition hide the cut edges of the soffit lengths as they connect with the fascia. If your soffit winds around a corner, smash two pieces of J-aqueduct diagonally between the corners of the roof and business firm. Then cut the soffit sections accordingly.
Related Questions
Should you lot nail J-aqueduct tightly?
It's always recommended to follow the nailing instructions on the detail manufacturer's website or in the installation instructions that comes with your J-channel. Regardless, it should exist noted never to nail the J-channel as well tight. This does non allow for any wiggle room due to contraction and expansion.
Is there a way to avert using J-aqueduct?
If yous don't like the await of J-channel as a trim for your vinyl siding, there are other options yous can choose from. Yous can use a product called "Tear Away Bead" that is well-nigh invisible when caulked side by side to a window. Additionally, you can DIY your own trim out of wood or other relevant materials.
Related Guides
- Vinyl Siding Keeps Coming Loose?
- How To Cut Outside Vinyl Siding
- How To Hang Heavy Things On Vinyl Siding
- How To Install An Exterior Light On Vinyl Siding
Recently Published

Source: https://upgradedhome.com/how-to-install-j-channel-under-existing-siding/
Posted by: youngweneary.blogspot.com
0 Response to "How To Install J Channel On Existing Siding"
Post a Comment