How To Restart Windows Installer Service
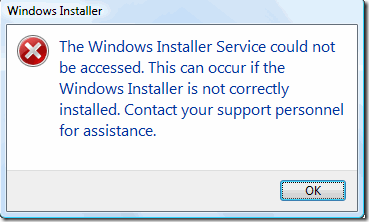
Recently, a friend of mine tried to install a program on his Windows machine and the computer gave the blue screen of death error. After he restarted his computer, he tried to run a different program and he got the following message:
The Windows Installer service could not be accessed. This can occur if the Windows Installer is not correctly installed.

If you are getting this error in Windows, here are a few things you can try to fix it!
Method 1 – Make sure the Windows Installer service is started
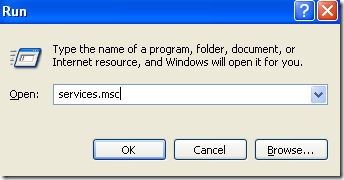
Sometimes, if the Installer service is disabled, you will get this error. You can turn it on by going to Start, then Run and typing in Services.msc. In newer versions of Windows, just click on Start and start typing services.msc.

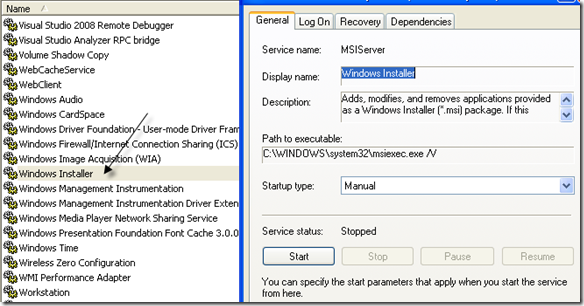
Then scroll down to Windows Installer and double-click on it. Set the Startup Type to Manual, click Applyand the click Start to start the service.

You can also start the service by going to Start, Run and type in net start MSIServer into the Run box.
Method 2 – Delete MSIEXEC with no extension
Another strange thing that can happen is the creation of a second msiexec file in your C:\Windows\system32 directory. By default, there should only be one msiexec.exe file in that directory, but sometimes another one gets created with no extension and a size of 0 KB.
If that is the case, then you should rename the extra msiexec file with a .OLD extension. Once you rename it, then you can restart the Windows Installer service. Again, just go to Services and right click on Windows Installer and choose Restart.
Method 3 – Modify Remote Procedure Call Service
Sometimes the issue can be caused by another service called Remote Procedure Call. Go to the Services section again like mentioned above (Start, Run, services.msc) and right-click on Remote Procedure Call (not the one that says RPC Locator) and choose Properties.
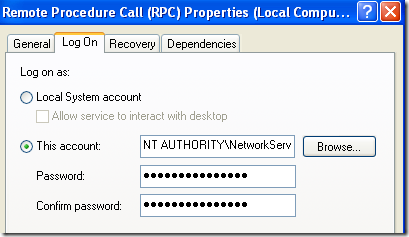
Now click on the Log On tab and under Log on as:, choose Local System Account and tick the Allow this service to interact with the desktop checkbox. Then restart your computer and see if the problem goes away.
If that does not work, choose the This account: radio button and click Browse. Search for Network Service and click OK. The password will automatically be filled in for this account, so don't change it.

Again, restart your computer and see if the problem goes away. Note that if it goes away when you chose Local System Account, just leave it at that setting. Only change it to NT Authority\NetworkService if Local System Account does not work.
Method 4 – Reinstall Windows Installer Service
If that does not work, you can download the Windows Installer Service and re-install it! Kind of ironic eh!? Do this if you do not even see the service listed in the Services applet or if nothing else works.
You can download the MSIServer package from WinHelpOnline. Once you download it, unzip it and right-click on the .REG file and click Merge. Click Yes when asked to confirm. This basically adds the required registry keys for the Installer service to work properly.
Method 5 – Install the latest Windows Installer version
Finally, you can do a search on Google for "Windows Installer" and download the latest version from Microsoft. This will ensure that you are not running an older version that could be causing conflicts with other software, etc.
Hopefully one of these solutions will fix your problem! If you did it another way, please post a comment letting us know how! Thanks!
Do not share my Personal Information.
How To Restart Windows Installer Service
Source: https://helpdeskgeek.com/how-to/how-to-fix-the-windows-installer-service-could-not-be-accessed-error/
Posted by: youngweneary.blogspot.com

0 Response to "How To Restart Windows Installer Service"
Post a Comment